
Zabbix template for collecting IO statistics

Zabbix template for collecting IO statistics
With this template you can collect different disk statistics.
Bytes/Sec

Installation

To install, copy userparameter_diskstats.conf to /etc/zabbix/zabbix_agentd.d/userparameter_diskstats.conf and lld-disks.py to /usr/local/bin/lld-disks.py. Do not forget to mark it executable.
# diskstats user parameters config
sudo mkdir -p /etc/zabbix/zabbix_agentd.d/
sudo wget https://raw.githubusercontent.com/grundic/zabbix-disk-performance/master/userparameter_diskstats.conf -O /etc/zabbix/zabbix_agentd.d/userparameter_diskstats.conf

# low level discovery script
sudo wget https://raw.githubusercontent.com/grundic/zabbix-disk-performance/master/lld-disks.py -O /usr/local/bin/lld-disks.py
sudo chmod +x /usr/local/bin/lld-disks.py
userparameter_diskstats.conf is user parameters for Zabbix. lld-disks.py is low level discovery script for enumerating disks of your system.
After that restart zabbix-agent sudo service zabbix-agent restart
Go to Zabbix's web interface, Configuration->Templates and import 
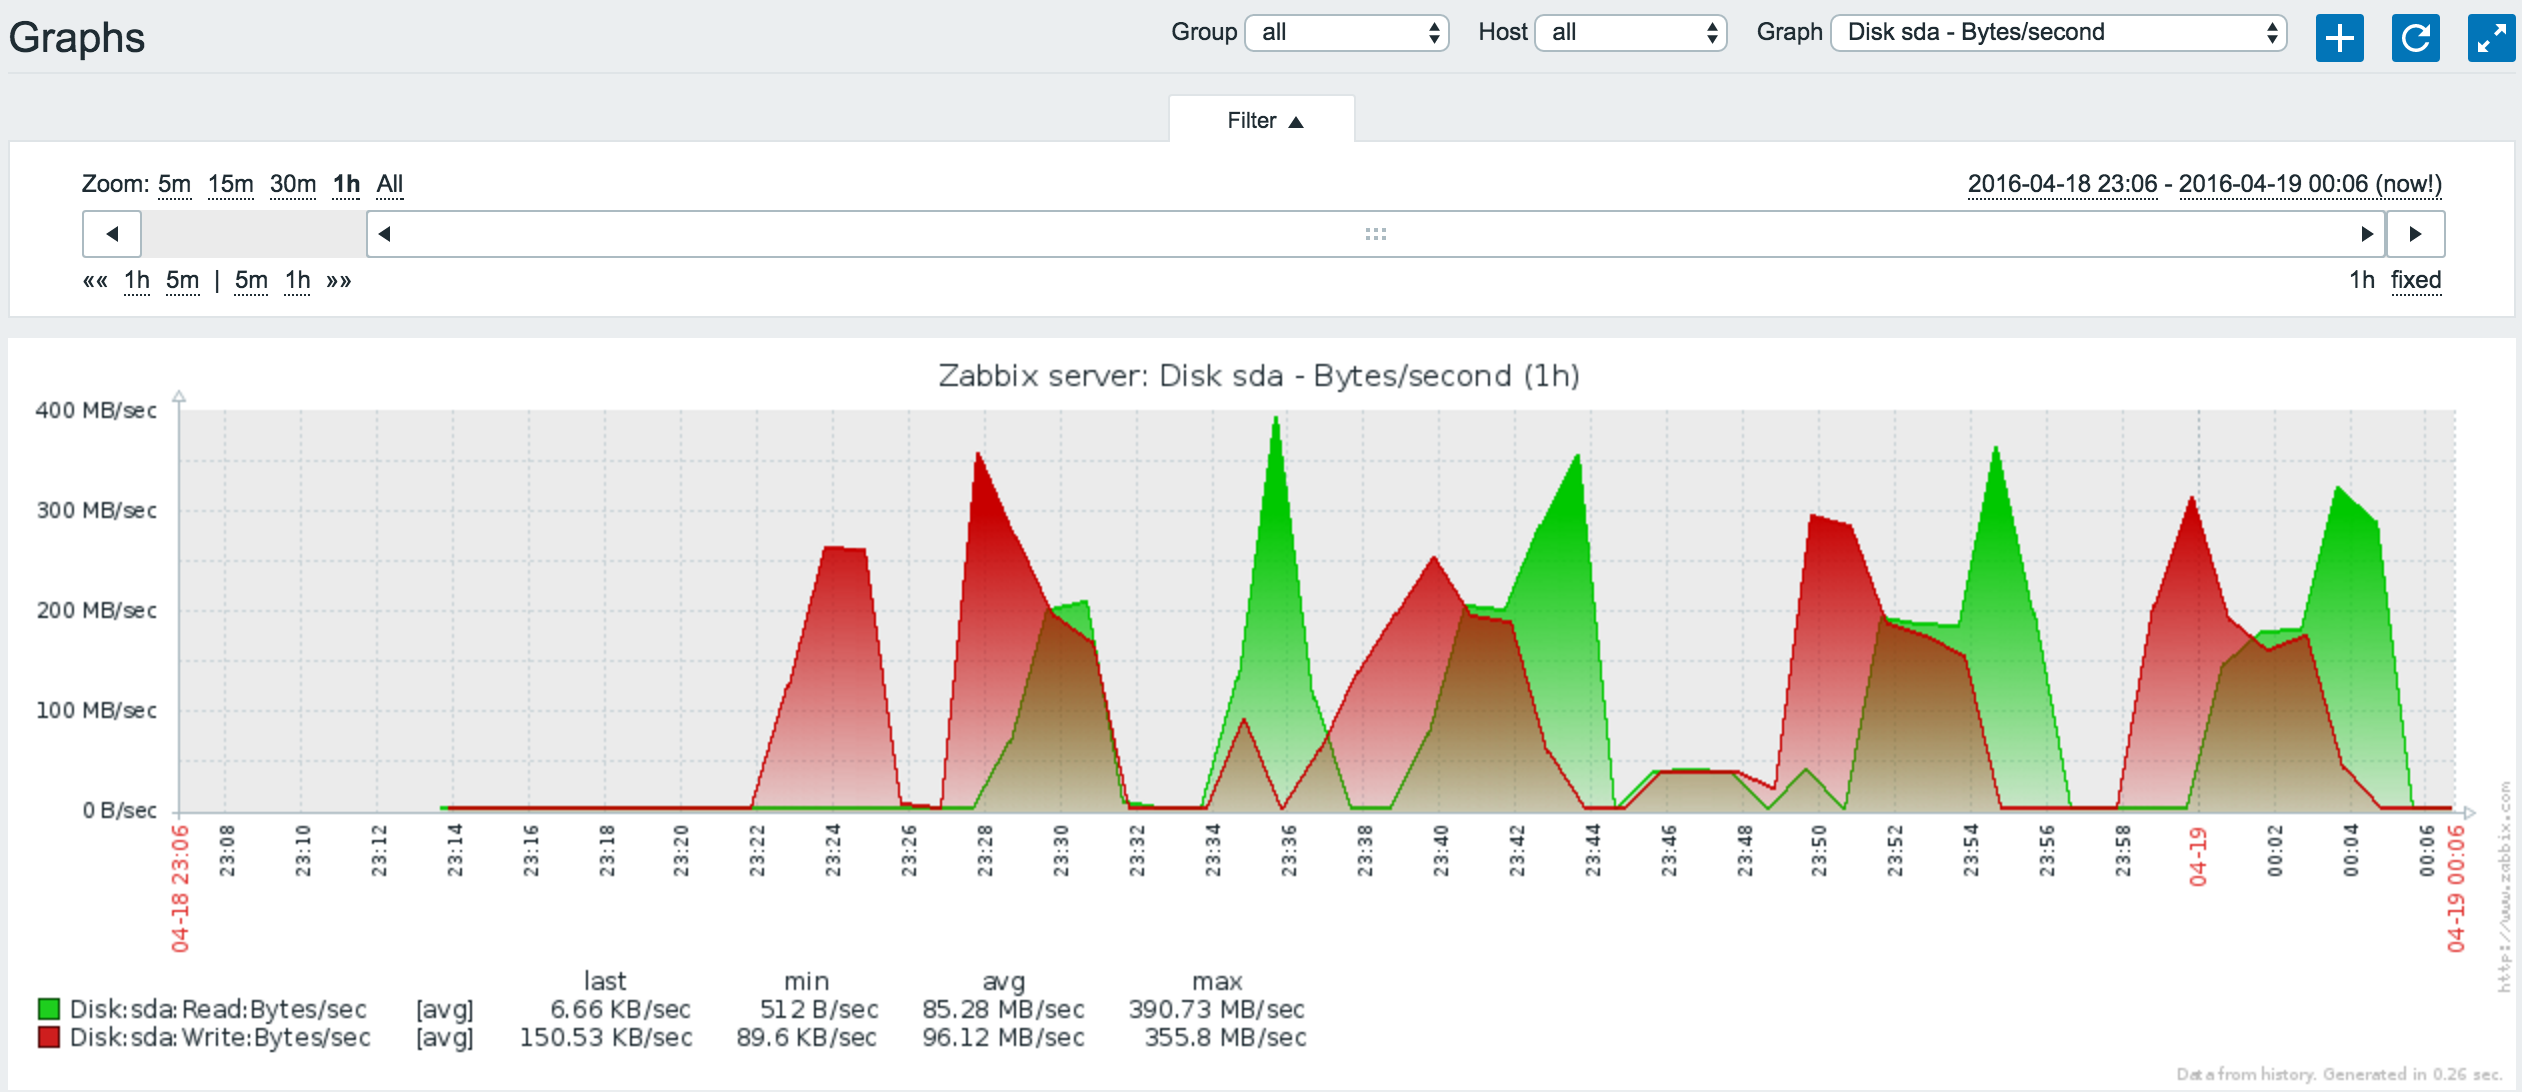
Template Disk Performance.xml. After that you should be able to monitor disk activity for all your disks.
Please note, that items and graphs are created for each disk/partition individually using discovery script, so do not expect to find them under usual configuration -- they would be in Discovery rules section:
Discovery Rules
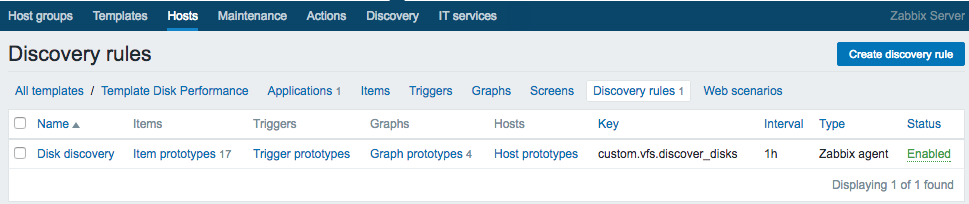
Low level discovery will list your RAID devices, and LVM volumes, but LVM volumes will be mapped with their device-mapper ID, not the pretty names.

Using without User Parameters

Zabbix have standard parameters for monitoring disk io: vfs.dev.read and vfs.dev.write with several types:
  • sectors
  • operations
  • sps
  • ops
Template have this values configured, but disabled by default.

Testing

To test that everything work use zabbix_get (from some time this is in it's own package, so do apt-get/yum install zabbix-get):
# view result of low level discovery
zabbix_get -s 127.0.0.1 -k "custom.vfs.discover_disks"
# view statistics for 'sda' disk
zabbix_get -s 127.0.0.1 -k "custom.vfs.dev.write.sectors[sda]"

Comments

Popular posts from this blog

How to remove zabbix-agent from Ubuntu 16.04 (Xenial Xerus)

Uninstall zabbix-agent To remove just zabbix-agent package itself from Ubuntu 16.04 (Xenial Xerus) execute on terminal: sudo apt-get remove zabbix-agent Uninstall zabbix-agent and it's dependent packages To remove the zabbix-agent package and any other dependant package which are no longer needed from Ubuntu Xenial. sudo apt-get remove --auto-remove zabbix-agent Purging zabbix-agent If you also want to delete configuration and/or data files of zabbix-agent from Ubuntu Xenial then this will work: sudo apt-get purge zabbix-agent To delete configuration and/or data files of zabbix-agent and it's dependencies from Ubuntu Xenial then execute: sudo apt-get purge --auto-remove zabbix-agent

Install Zabbix Agent on Suse Linux and Configure

Install taken from Suse –  http://software.opensuse.org/download/package?project=server:monitoring&package=zabbix-agent For SLE 12 SP1 run the following as root : zypper addrepo http://download.opensuse.org/repositories/server:monitoring/SLE_12_SP1/server:monitoring.repo zypper refresh zypper install zabbix-agent For SLE 12 run the following as root : zypper addrepo http://download.opensuse.org/repositories/server:monitoring/SLE_12/server:monitoring.repo zypper refresh zypper install zabbix-agent For SLE 11 SP4 run the following as root : zypper addrepo http://download.opensuse.org/repositories/server:monitoring/SLE_11_SP4/server:monitoring.repo zypper refresh zypper install zabbix-agent For SLE 11 SP3 run the following as root : zypper addrepo http://download.opensuse.org/repositories/server:monitoring/SLE_11_SP3/server:monitoring.repo zypper refresh zypper install zabbix-agent To configure the agent – Instructions taken from – https://www.zabbix.org/wiki

Zabbix alert Notification with Telegram

Zabbix Notifications with graphs in Telegram. Features  Graphs based on latest data are sent directly to your messenger  You can send messages both in private and group chats  Channels support  Saves chatid as a temporary file  Simple markdown and HTML are supported  Emoji in messages First of all : Nedd to install python (>3) on Cent os  # yum -y install python-pip # yum install -y https://centos7.iuscommunity.org/ius-release.rpm #  yum install -y python34u python34u-libs python34u-devel python34u-pi # yum -y install python-pip You need to install the  requests  module for python, this is required for operation! # pip install requests Put  zbxtg.py  in your  AlertScriptsPath  directory, the path is set inside your zabbix_server.conf (once confirm by zabbix server conf file ) Link to download ZBXTG.PY file  https://drive.google.com/open?id=0BxB8j19aCMZ8dFl1aHVuLVJyRjQ # cp zbxtg.py /usr/local/share/zabbix/alertscripts/ Create